


How to Make Homemade Candles: Step-by-Step Guide
Homemade candles not only add a touch of personality to your home, but they can also be a perfect gift for friends and family. In this guide, we will show you how to make DIY candles using the products of "La Bottega delle Creazioni". We will follow a detailed, step-by-step approach, suitable even for beginners. You will learn to choose materials, prepare the mold, melt and color the wax, fix the wick and decorate your candles. Ready to get started?
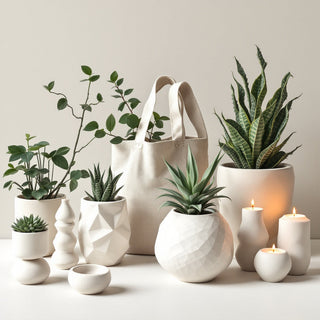
Necessary Materials
First, get the following materials:
- Wax : This can be soy wax, paraffin or beeswax.
- Containers : Thick glass jars (not less than 3 mm), metal containers, ceramic or silicone molds.
- Wicks : Pre-waxed pure cotton with metal base.
- Dyes : Specific pigments for candles or specific liquid dyes for wax.
- Fragrances : Be sure to use wax-specific fragrances.
- Precision scale/spoon : To weigh the fragrance.
- Small saucepan : To melt the wax in a bain-marie.
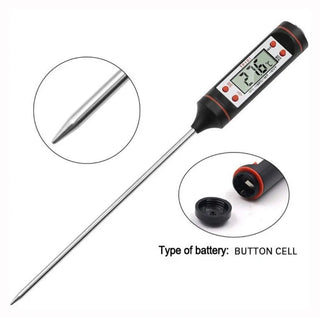
- Thermometer : To monitor the temperature of the wax.
- Double-sided adhesive pads : To fix the wick.
You can find the necessary materials here .

Step 1: Preparing the Container
Description :
- Wash and dry the chosen container well, making sure there are no residues or cracks and that it is heat resistant.
- Attach the wick to the bottom of the container using a double-sided sticky pad or melted wax.
- Make sure the wick stays straight by using a wooden or metal wick holder or a clothespin.

Step 2: Melt the Wax
Description :
- Use a small saucepan to melt the wax in a double boiler, stirring occasionally with a plastic or wooden paddle. Check the temperature with the thermometer and be careful not to exceed 90°C.
- If you want to color the wax, add candle pigments or liquid dyes when the wax is between 75°-85°C.
-
Add the fragrance at a temperature between 65°-70°C and mix slowly for at least 1 minute.
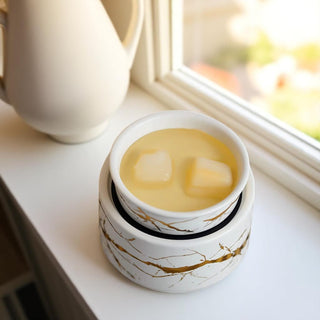
Step 3: Pour the Wax

Description :
- To avoid air bubbles, be sure to slowly pour the melted wax into the prepared container, leaving some room at the top.
- Make sure the wick stays centered and straight.
- Let the candle cool and solidify for at least 24 hours or overnight.
- For the best yield and scent, wait 10-15 days before lighting your candle.

Step 4: Finishing and Decorating
Description :
- Once the candle has completely cooled and solidified, trim the wick leaving about half an inch above the surface of the wax.
- You can decorate the candle by adding dried flowers, glitter or drawings with specific candle pens. Use your creativity to further customize your creation. There are no limits except imagination.

Tips and Tricks
- Heat the container: you can heat the container slightly with a hairdryer to help the wax stick to the edges and avoid cracks forming in the wax once it has solidified.
- Experiment : Try different combinations of wax, colors and scents to find your favorite.
- Safety : Work in a well-ventilated area and use caution when handling hot wax.
- Recycle : Consider reusing old glass containers or cups for an eco-friendly project.
- Experiment diary : Keep a small diary where you can record all your experiments.
- How to calculate the amount of wax needed : Fill the container/mold and weigh the amount of water that goes into the container and use this conversion factor:

- How to calculate the amount of fragrance needed: To correctly calculate how much fragrance you need to add, you can do this simple calculation:

Conclusion
Making homemade candles is a creative and rewarding activity. By following these simple steps, you can create beautiful personalized candles that will add a special touch to your home or make your loved ones happy. Good fun!
Next Steps
If you wish to delve further, visit the "La Bottega delle Creazioni" website to find all the necessary materials and other creative ideas for your homemade candles.
That's all for this article and I'm really curious to know if you managed to make your own soy wax candle following my advice 😍 If you like, let me know in the comments 😊
Silvia
Ciao, ho seguito passo passo le indicazioni ma mi vengono crepe intorno allo stoppino…come posso rimediare?
Ennuyé
Grazie mille veramente tanto interessante
Maria teresa
Siete molto generos perché rispetto ad altri kit che ho preso su altri siti sono ben forniti e ottima qualità
Marina
Ciao sono marina o inziato da qualche giorno a fare candele. Ho preso un piccolo kit su amaz ,giusto per iniziare. Proverò il tuo metodo grazie.
Penka
Perfetto