


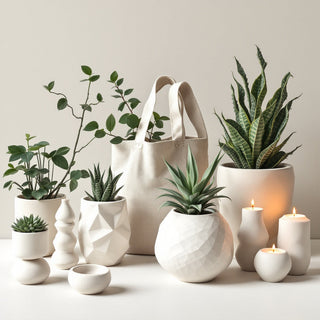

Complete Guide to Making Candles with Silicone Molds
Welcome to the continuation of our practical guide to making DIY candles! If you followed our first article "Practical Guide to Making DIY Candles" , on how to create homemade candles, you will already know how fun and rewarding this hobby can be. Today we will delve into the making of candles using silicone molds, a technique that allows you to obtain candles of various shapes and sizes with a professional finish. Ready to get started?
Necessary Materials
To get started, make sure you have all the materials listed below:
- Wax : The most used are high melting point soy wax, pillar blend olive wax, paraffin and beeswax.
- Silicone molds
- Cotton wicks
- Needle to pierce the mold and insert the wick
- Dyes (optional)
- Fragrances (optional)
- Stearin (optional)
- Small saucepan for melting wax in a bain-marie
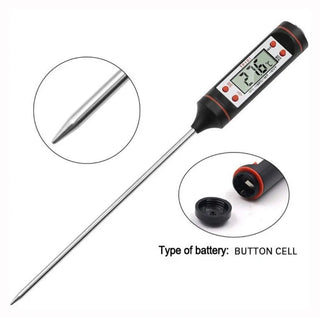
- Thermometer
- Balance

Detailed Procedure
Step 1: Melt the Wax
- Preparation : Prepare the saucepan for the bain-marie and melt the wax, stirring occasionally.
- Temperature : Use the thermometer to check the temperature of the wax and make sure it does not exceed 90°C.
- Stearin : If you use stearin, melt it together with the wax while it is still on the heat, stirring well until it is completely dissolved. (optional)
- Colorants and Fragrances : Add colorant and fragrance to the melted wax and mix slowly for at least 1 - 2 minutes. The fragrance should be added when the temperature of the wax has dropped to 72° - 75°C while you can start adding the colorants already between 80°C - 85°C
Tip: do not add fragrances when the wax has a temperature higher than 75°C as many fragrances do not tolerate too high temperatures, check the technical data sheet before proceeding (or ask us for help 😊 )

Step 2: Preparation of the Mold
- Wick : Pierce the center of the mold with a needle and insert the wick.
- Fixing : Cut the wick to the desired length and secure it with a clothespin or a wooden wick holder.
- Grease the Mold : For particularly detailed or complex molds, lightly greasing the mold with a vegetable oil can make it easier to remove the candle.

Step 3: Pour the Wax
- Checking the Details : Make sure the mold is free of defects and well cleaned to avoid imperfections being reflected on the surface of the candle.
- Pour the Wax : Pour the wax slowly into the heated mold (use a hairdryer to heat it) to avoid the formation of bubbles and the frosting effect, starting from the center and gradually filling the mold, always maintaining a temperature between 70°-75°C .
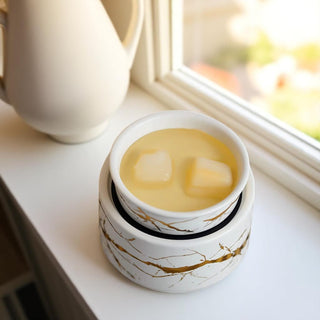
Step 4: Cooling and Extraction of the Candle
- Cooling : Let the candle rest in the mold for 24-48 hours in a room with constant temperature and stable conditions, without drafts. The cooling time obviously depends on the size of the candle and the temperature of the environment.
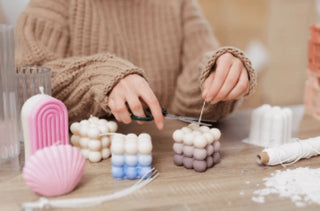
- Candle finishing
- Trimming the Wick : After removing the candle from the mold, trim the wick leaving approximately 0.5cm above the surface of the candle.
- Removing Imperfections : If there are imperfections on the surface of the candle, you can smooth them out lightly with a sharp knife, scraper or spatula.

Useful Tips
- Frosting Effect : Heat the mold with a hairdryer before pouring the wax to avoid the frosting effect, a white film on the surface of the candle that can form if the wax cools too quickly, especially with natural waxes such as soy wax.
- Stearin : Mix vegetable waxes with 5-10% stearin, 10% recommended, to give the wax more resistance and improve the quality of combustion.
- Experiment : Try different combinations of waxes, colors and scents to create unique candles.
- Working Environment : Be sure to work in a draft-free environment to prevent the hot wax from cooling too quickly or dust and debris from contaminating the candles.
- Burn Test : Before making large quantities of candles, perform burn tests to ensure they burn properly and evenly.
- Choice of wick : If you notice problems while burning, such as flames that are too high or low, try a different type of wick.
- Dyes : Avoid exceeding the quantity of dye to avoid combustion problems, the right quantity must be determined based on the type of dye. For information do not hesitate to contact us.
Candle Storage
- Away from Direct Light : Store candles away from direct sunlight to prevent colors from fading.
- Cool and Dry Environment : Store candles in a cool and dry place to preserve their quality.
Conclusion
Creating DIY candles with silicone molds is a fantastic way to express your creativity and give personalized gifts. By following these simple steps, you can make beautiful candles that will add a special touch to your home or make your loved ones happy. Happy creating!
Next Steps
If you want to delve further, on our site you can find all the suitable materials for this and other creative ideas for your homemade candles.
Eleonora
Ciao io vorrei imparare a creare candele di tutti i tipi ..e colori…avete qualche video?
Bencivenga Paoka
Grazie per le buone informazioni. Creo candele ma alcune cose non le sapevo. Quindi GRAZIE
Alessia
Buonasera,
vorrei chiedere un’informazione. Come si sceglie la fragranza giusta? Ho visto che sul vostro sito variano in base alla percentuale.
Si devono scegliere in base alla percentuale da inserire per fare la candela? Grazie mille
Saluti
Barbara
Ciao io ho un dubbio su come deve bruciare una candela in stampo. So che nel contenitore deve formare una piscina intera e la fiamma non deve essere ne alta ne bassa, ma nella candela in stampo, ci deve essere una piscina contenuta in mezzo cm di margine o deve bruciare senza nessun margine? Questa cosa non mi e’ chiara . Ok la regola della fiamma e’ la stessa ma i margini di cera devono esserci o deve bruciare in modo totale come la classica candela lunga di diametro 2 cm ? Spero di essere stata chiara . Ringrazio per la risposta.
Teresa
Potrei avere maggior informazioni x quanto riguarda le candele colorate ….a me non vengono mai bene